Metroid Prime Remastered is a hi-fi return to the home planet for anyone who played Nintendo’s iconic action-adventure game when it first came out back in 2002. But Remastered is also a fresh opportunity for those of us who were sleeping or busy being literal children back then—a first chance to be Prime’s version of intergalactic bounty hunter Samus Aran, this time in vibrant color and with modern controls. I learned a lot from my first trip around oozing Tallon IV, and I’m ready to impart it onto you. Here are some things I wish someone told me before I started playing Metroid Prime Remastered
Read More: “Metroid Prime Remastered Is Selling Out, Going For $100+ On eBay”
Try reverting your controls to “classic” or “hybrid” if you’re prone to FPS motion sickness
Remastered has extensive accessibility and controller options, both of which are worth a look.
From “display,” you can customize a few heads-up display features, including whether or not it moves with Samus’ first-person movements, and turn on a “color assist” feature if you can’t distinguish between certain colors.
From “sound,” aside from typical special effects and music adjustment, you can also choose to turn on “full” or “partial” narration and subtitles, which were added to the game for their original Japanese and European releases, respectively. The narration is sparse, only really occurring at the start and very end of the game, but it could be intriguing for U.S. fans of the series curious about international versions.
And from the “controls” option, you can choose to play using the default dual stick option, “pointer,” which “enables motion controls for camera movement and aiming” and is modeled after the Metroid Prime: Trilogy’s Wii settings; “classic,” which reverts you to GameCube controls; or “hybrid,” which blends GameCube with “motion controls for aiming.” I played mostly with modern standard dual stick controls, but noticed that hybrid’s gummier up-and-down motions were useful for keeping my motion sickness in check. They all deserve a test drive, though, either for fun or for nostalgia.
Lock on to enemies
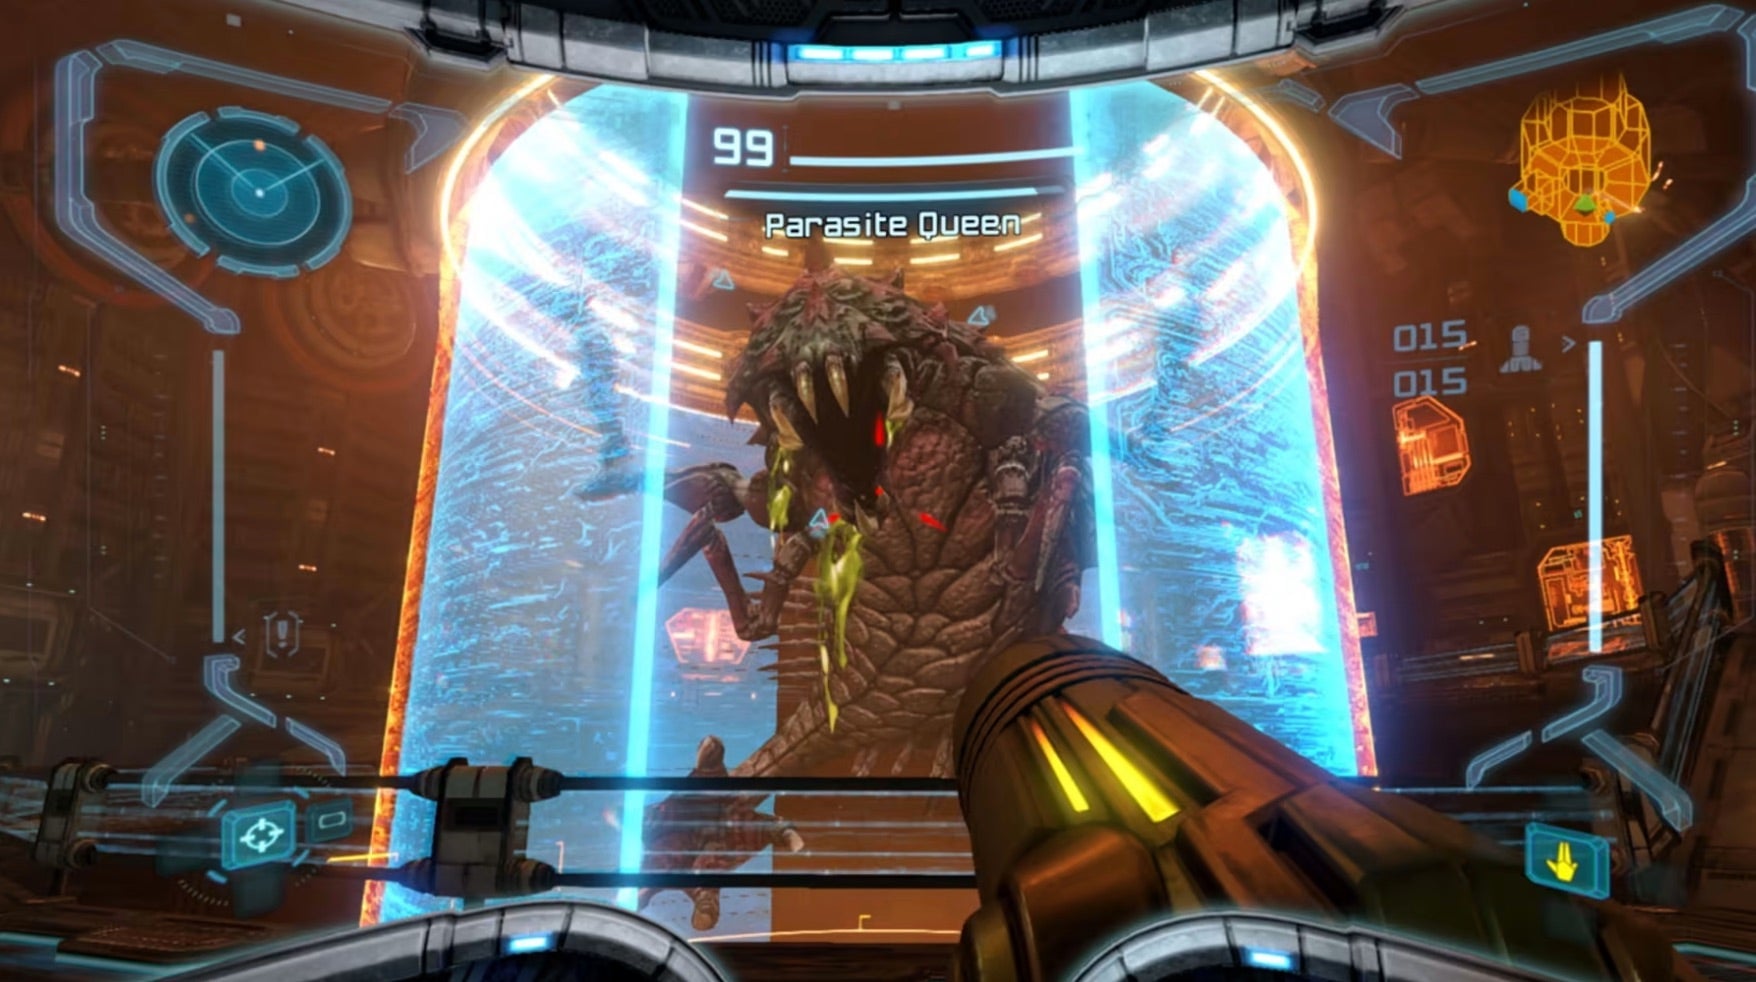
Remastered uses ZL as an enemy lock-on button, but it wasn’t the kind of combat lock-on I’m used to—it more or less imbues you with perfect aim. For me, using it at first felt like cheating, but it ultimately pushed me off of thinking about Remastered as a first-person shooter. It’s a meandering adventure game where kills aren’t nearly as important as exploring every lit corridor, so you might as well shoot as well as you can with the tools the game gives you.
Press B and strafe
Locking on to enemies also allows you to strafe, or jump seamlessly around them, by pressing B and pushing your right stick to either side. The effective dodge isn’t possible without locking on, and it’s the best way to avoid health-melting enemy attacks while keeping a battle fast-paced.
Make sure you’re using every type of dodge you can, though, especially during Space Pirate fights when you need to defend your front, back, and head from obnoxious flying goons. Even if you’re not locked on to any particular enemy, keep pressing B to jump over attacks. You’re not above hiding behind crates either.
Smash every crate
When you’re not hiding behind crates, you should be cracking them open. They often contain health and ammo—something to keep in mind if you’re running low during a fight. Be cautious around crates with glowing orange innards, though. Though they also contain items, they can explode and kill you. Harvest them from a safe distance.
Though, throughout your travels, you’ll grab up to 14 Energy Tanks to expand your health bar by 100 points a pop. Ultimately, that’s a lot of health, and you don’t really need to stress about preserving it the way another game might force you to. But it can get cut down quick, especially by magma pools or other environmental hazards, so guard it a bit. Checking out your health bar also lets you know how urgently you need to pick up the loose orbs of health and ammo enemies tend to drop.
Hold A during battle
Holding A down not only charges Samus’ Power Beam, but also activates its magnet-like ability to suck fallen enemies’ dropped items toward you. Need more missiles but the only item drop is suspended in the air, just out of reach? That’s fine. Vacuum that shit up. Combining this habit while getting used to kicking crates will make sure that health and ammo are never too much of a concern during huge skirmishes.
Target sentry drones for more missiles
Sometimes getting stuck is inevitable. While Samus’ default Power Beam and many of its variations—plasma, ice, purple waves of sizzling electricity—fire infinitely, missiles are limited and require your discretion. They’re the only weapon able to open certain types of doors and, in the early game, are one of the most effective ways to eliminate bosses and thick-skinned enemies like sentry drones, so you can, naturally, run out rather fast. Then, you might, naturally, get upset. You don’t need to be, though. Sentry drones tend to drop missiles more than other enemies. When you’re in a bind, simply head to the Monitor Station in Magmoor Caverns and kill them all.
Don’t forget to scan
Samus receives a few useful helmet visors throughout the game, including the thermal visor, which will help you find enemies in the dark; x-ray visor, which similarly lets you detect invisible enemies; and the scan visor you start out with.
The scan visor, which adds environmental observations and analysis to Samus’ logbook, might be nerdy, but it’s by far the most important visor in her arsenal. Using it reveals useful information about enemies and new areas, unlocks doors, and elevators.
And don’t be lazy when you use it—take a few seconds to actually read the information it provides you. Not only will it provide a deeper understanding of the game’s story, but it also tells you crucial next steps. It’ll point out crumbling blocks of stone, for example, so you can figure out the best place to use Samus’ Morph Ball bombs when she’s in her transformed, metal roly-poly form. It explains enemies’ weak points—even bosses’ weak points. It’s essential for navigating Tallon IV.
Don’t waste your time on enemies you can’t kill
Scanning also keeps things moving. Don’t be like me and wonder why the ice-capped beetles keep stabbing and poking and just won’t die when the scan visor could have told you 10 minutes ago that you don’t have the right weapon to kill them. Read what you scan, and let what you learn inform your approach to combat.
Make sure hints are on
Scanning isn’t a cure-all, though. As a first time Metroid Prime player, I was often confused about where to go next. Hints, which you can flip on in settings, make sure I didn’t spin in circles for too long. If you spend too long idling, a question mark hint will appear on your map and gently guide you in the right direction.
When it doubt, go back to where you came from
Even without hints, take the age-old advice and retrace your footsteps. Metroid Prime requires you to scavenge the same places over and over again but, each time, you come back changed. Phendrana Drifts will look different once you get your springy space boots, and you’ll form a unique relationship with gravity once you secure a Morph Ball alteration that lets you sail up walls and railings like a scrawny spider.
I’m impatient, so I often sighed when Remastered made it clear that I was supposed to double back…which was most of the time. But checking out old corners with new gear makes them exciting again, and, as a treat, you’ll also get beneficial power-ups and expansions you weren’t ready for before.
Get extreme Boost Ball height by letting go at the last second
One of, I thought, the most annoying parts of turning back was realizing I had to turn back, curl Samus into a ball, and knock her around a steep ramp until she gained enough momentum to make a huge jump. These sections are aggravating. They might make you feel like the game is fundamentally broken and that you should flush your Switch down the toilet with your childhood goldfish. But it’s not that big of a deal; it takes a little finesse.
Hit boost while you’re only starting to move up a curve, then let go when you’re near the top. That’s the most reliable method to get in the air, but if you do it enough times, you’ll start to feel a rhythm for it.
Learn what an upgrade sounds like
Remastered is filled with hidden mazes and rooms, and it’s possible that you’ll miss an upgrade while standing right in front of it (I did!). But expansions and suit upgrades give off a (very) faint whirring sound when you’re near them. Turn down the music and crank up the SFX in settings to help you identify it.
Circle back to save points
Once you’ve found something important, try to hurry to your closest save point. Like the original, Remastered doesn’t allow you to save whenever or wherever, so respect your progress and save your game when the map lets you.
What are some of your most helpful Metroid Prime Remastered tips?