You wake up at 1 am to score a pre-order. You put yourself in manageable debt to finance it. You confirm the card on file is valid when it ships. You stay home to make sure UPS doesn’t drop the package down an open manhole instead of your door. You make sure nobody stapled the goddamn receipt to the screen that’s bafflingly unprotected in front of the box. You set up your system. You exhale. You did it. You won.
That is, until you have to spend three hours troubleshooting some other bullshit that happened during setup.
Make no mistake, the Switch 2 has already justified itself in terms of sheer gaming since it arrived a few weeks ago, but your fight’s not over yet just because you’re basking in the glorious light of Hyrule at 60fps. You’ve got some work to do if you’re looking to get your system exactly the way you want it out of the box. But we have come to you from the other side of the chaos with a few things you should know before the Switching hour.
Make the system remember you
Probably not a surprise that you’re gonna be signing into your Nintendo Account a LOT during the initial setup. But while the sign in screen conveniently gives you a QR code so you can sign in on your phone instead of doing the on-screen keyboard cabaret, it’s easy to ignore the fact that the Switch 2 screen has a little button onscreen to remember you. That button is not hit by default, so while you’re working on signing in, you might just guarantee that you’re gonna see this screen again in the very near future (it’ll come up again when you sign into the eShop for the first time, but that’s about it). Save yourself some annoyance, click that button on the Switch before you go to your phone.
Do System Transfer before anything else
It’s tempting to want to just slap the thing on your dock and get started as soon as possible. If this is, somehow, your first Switch, knock yourself out. But if you’re planning on transferring data from your old Switch to the new one, pump your brakes a sec.
Read More: The Nintendo Switch 2’s System Transfer Is Great If You Do It Correctly
The transfer process will throw up a message to connect the Switch to an AC adapter before starting. And they’re not asking, they’re telling. The popup will happen again and the process literally won’t be able to start until the Switch determines there’s enough power flowing into it.
For us homebodies that prefer to do their Switchery on TV instead of handheld, that’s fine for the system you’ve got docked. But then you’ll have to have your original Switch doing the same thing in its transfer menu, and it needs to be in close proximity of the Switch 2. Furthermore, whatever the Switch 2’s power demands are, 2 plain old USB-C chargers won’t do the job, either. It’s recommended to use the charger that came with the Switch 2 itself, i.e., the one you fucked up and plugged into your dock. If you’re a super fancy dual-handheld household, I personally managed to skate past it using my Steam Deck’s charger, but not everybody’s got that option. Once that’s done, though, both systems must remain in close proximity for the actual data transfer, which thankfully only took about 5 minutes. Basically, don’t go docking until that’s done.
Oh, by the way, the Switch 2’s kinda like an iPhone, you’ll only get the option to transfer your old data during the initial setup process. If you go to the main menu, you’ll have to factory reset the Switch 2 to do the transfer later.
Can’t use System Transfer? Use Nintendo’s website instead
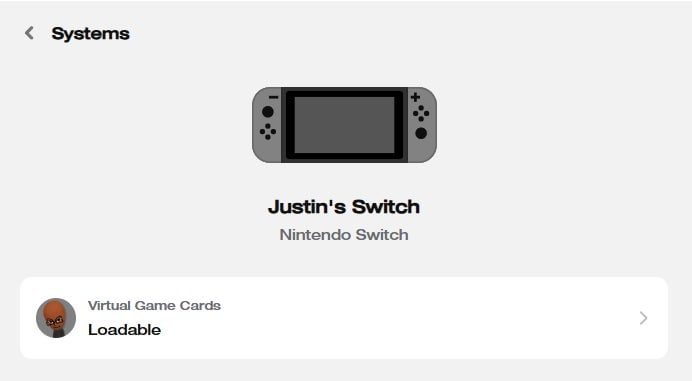
On the flipside, if you want access to your old stuff but don’t have access to your original Switch, you can at least do so from Nintendo’s site. Logic and common sense dictates that if you buy a game from a digital storefront, the game is tied to your account, and as long as you sign into your account, they’ll follow you anywhere. Nintendo, however, is not a logical company. As it turns out, while games will show up on your account, they’re actually tied to a specific console. System Transfer takes care of linking the games to your Switch 2 for you, but if that’s not an option, there is an alternative.
Go to accounts.nintendo.com, and you’ll see a section for Game Systems. Click that, then select your original Switch. You’ll see a bar marked “Loadable”. Click that and unlink that system. Now, whenever you go to download anything from your library, it’ll link it to the new system.
You can have 4k or 120hz; you can’t have both
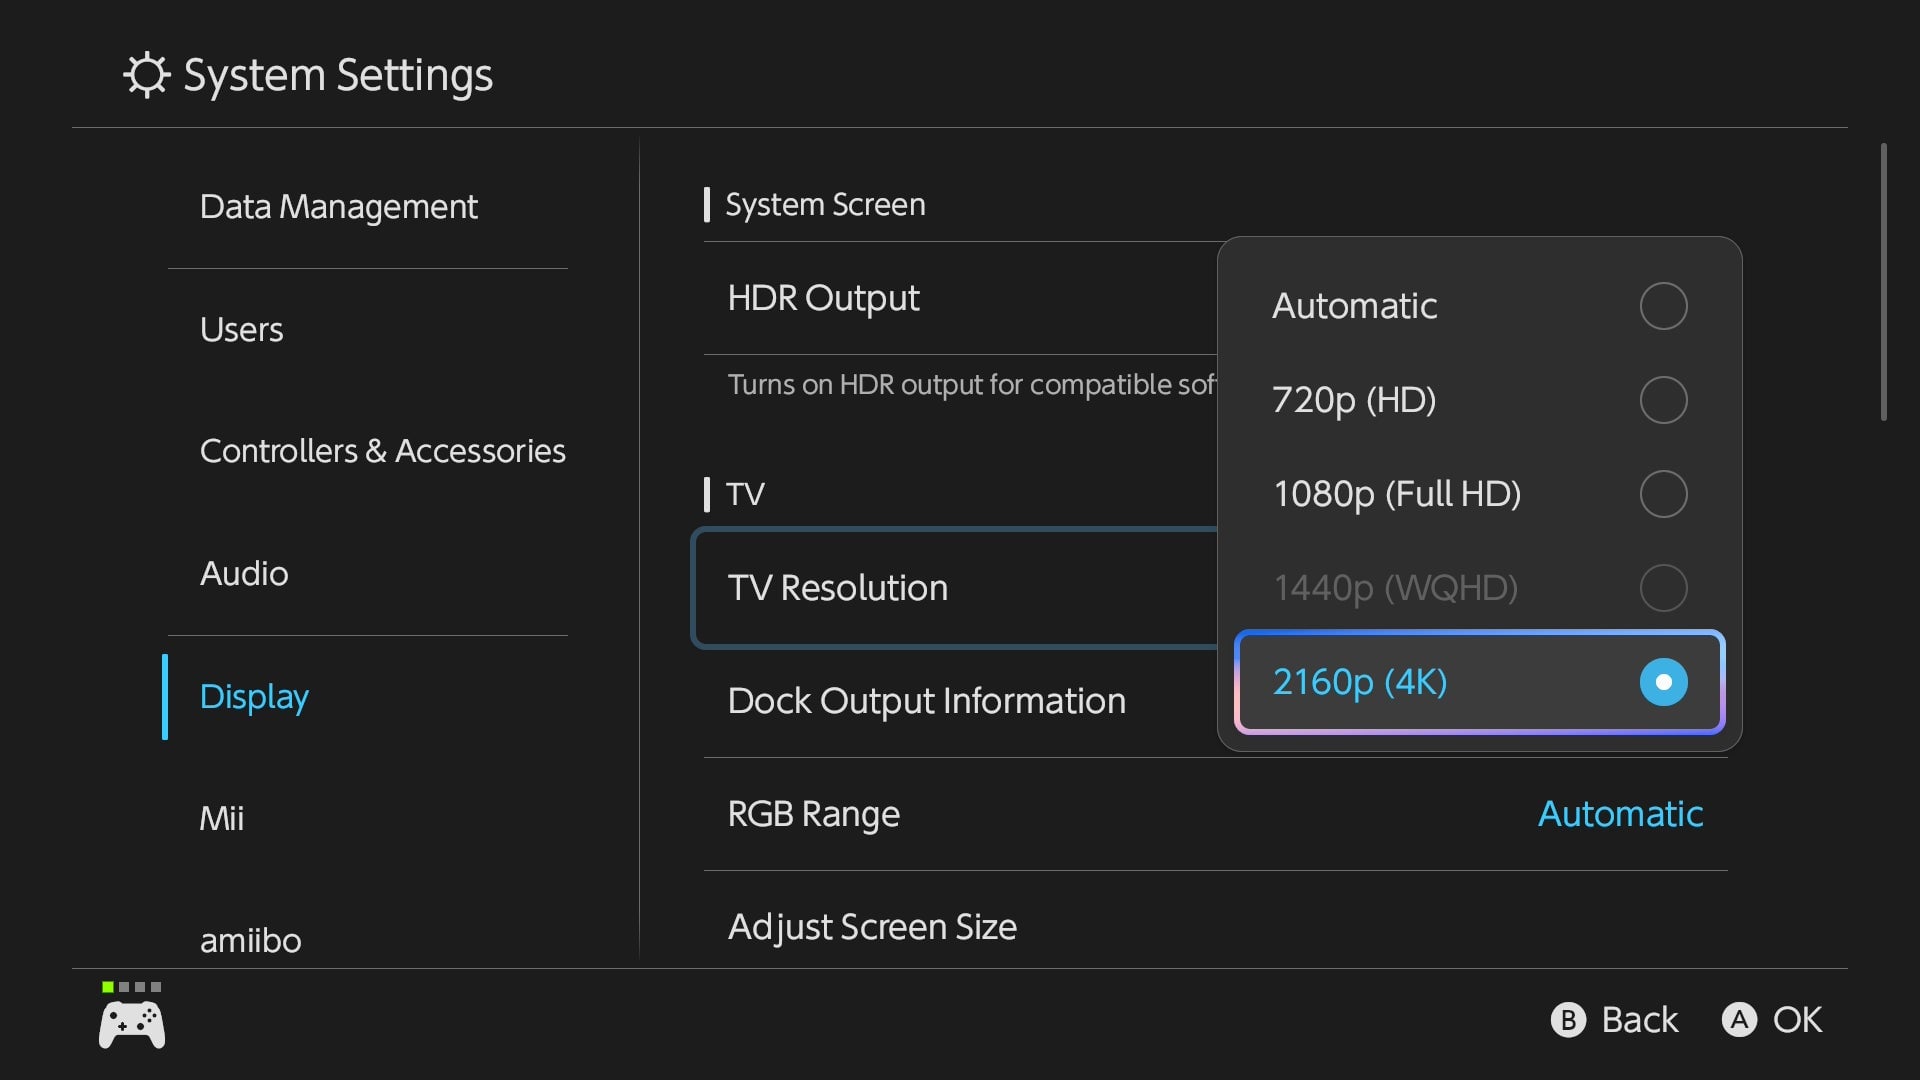
Those lucky folks with fancier 4K TVs might’ve gotten excited to find out the new Switch supports 4K and 120hz modes, and then been dumbfounded when the Display Options only showed 60fps. Before you start the wailing and gnashing of teeth in Ultra HD, let’s clear up the mystery: The Switch can only do 120fps in 1080p and 1440p, while 4K is limited to 60.
Read More: Just How Long Is Nintendo Switch 2 Welcome Tour?
The “good” news is that as of launch, the only game with anything that even supports 120fps is a minigame in Welcome Tour, while the only 100% confirmed game in the future that will support it is Metroid Prime 4. Yes, there was a rumor Mario Kart World might have it, but no dice on that one. Basically, though, you’re not missing anything, really.
Oh and also, the same goes for VRR, which is only supported in handheld mode.
Turn on Auto Uploads for the Switch Online App
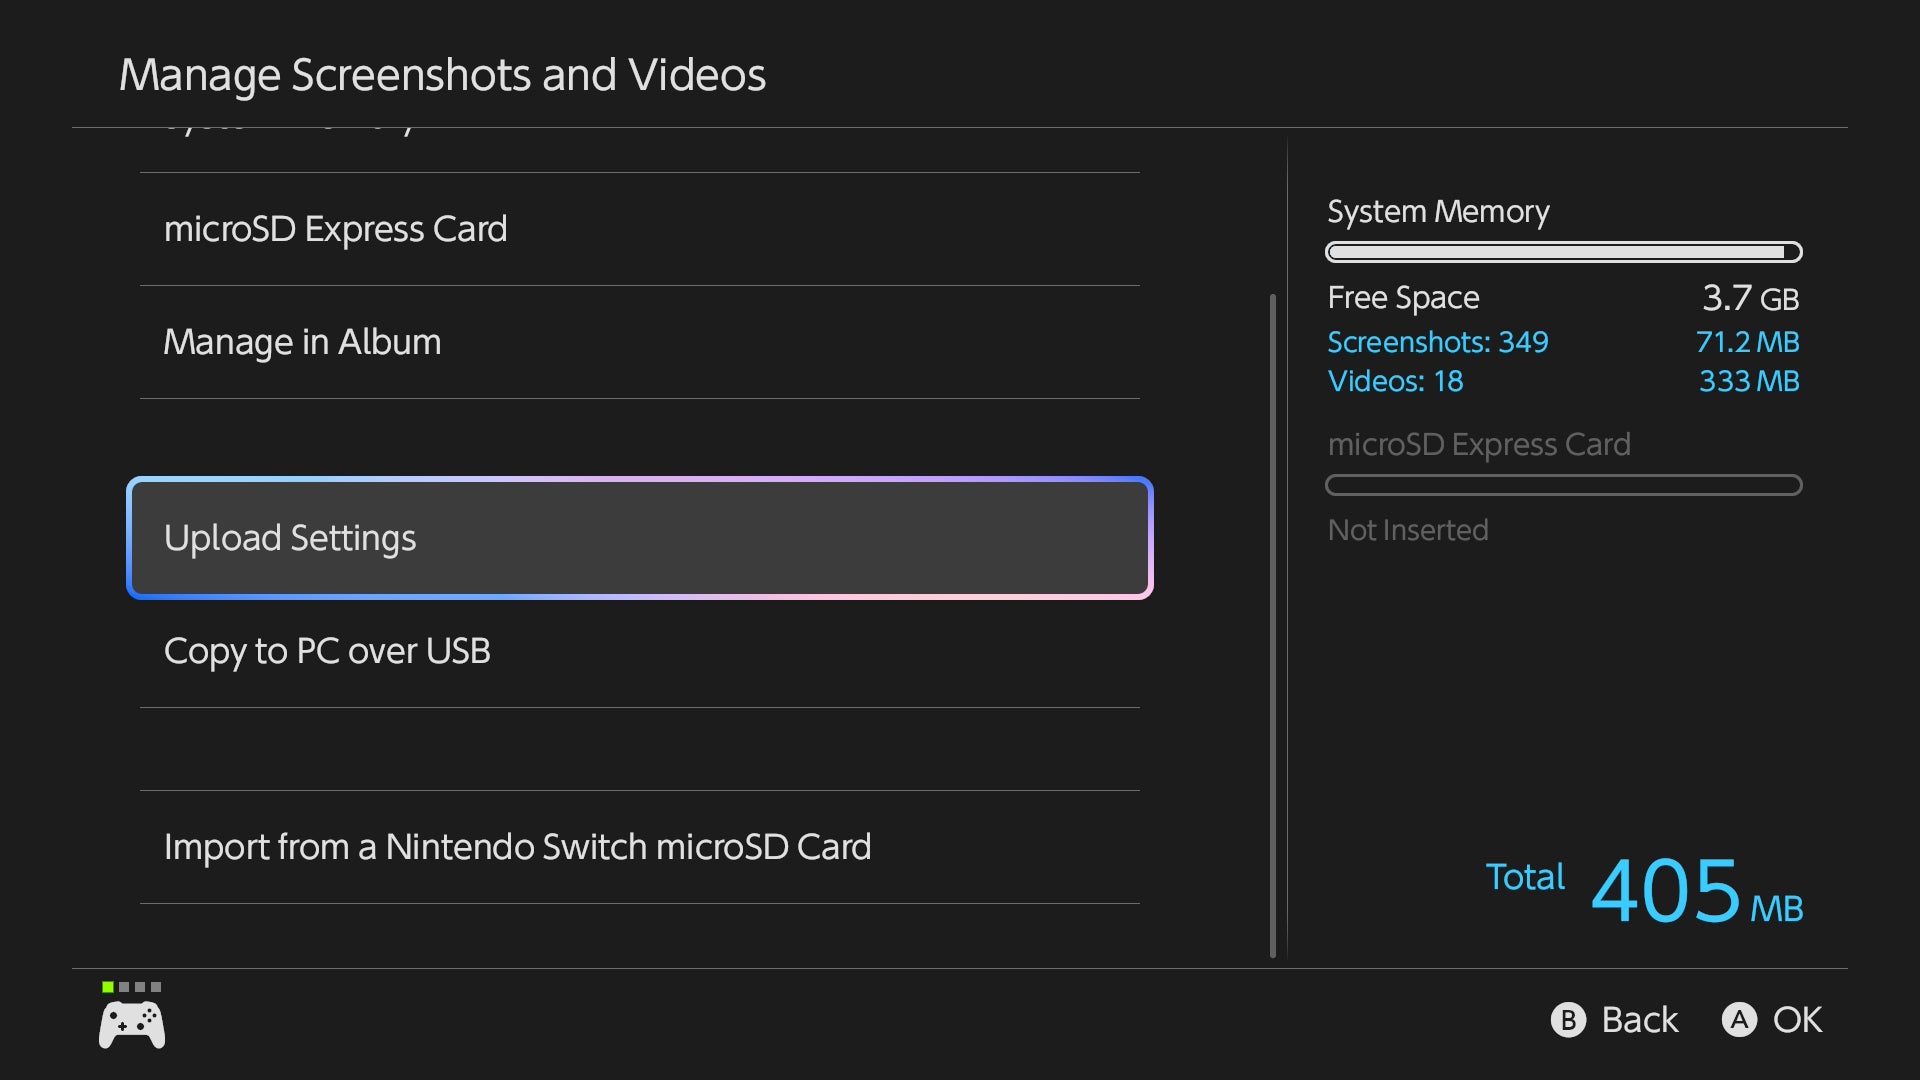
Good news! The Switch Online app is actually extremely useful with the Switch 2, and not just for the most convoluted voice chat ever. One of the big improvements is that Nintendo’s joined the rest of the pack this console generation and included a feature where screenshots get uploaded to a centralized location to be accessed off of your system. Excellent news, but they also kinda bury the lede that you need to actually turn that feature on from the Switch 2 to make it happen. The option’s in the Upload Settings menu in the Album app.
Clearing up the controller conundrum
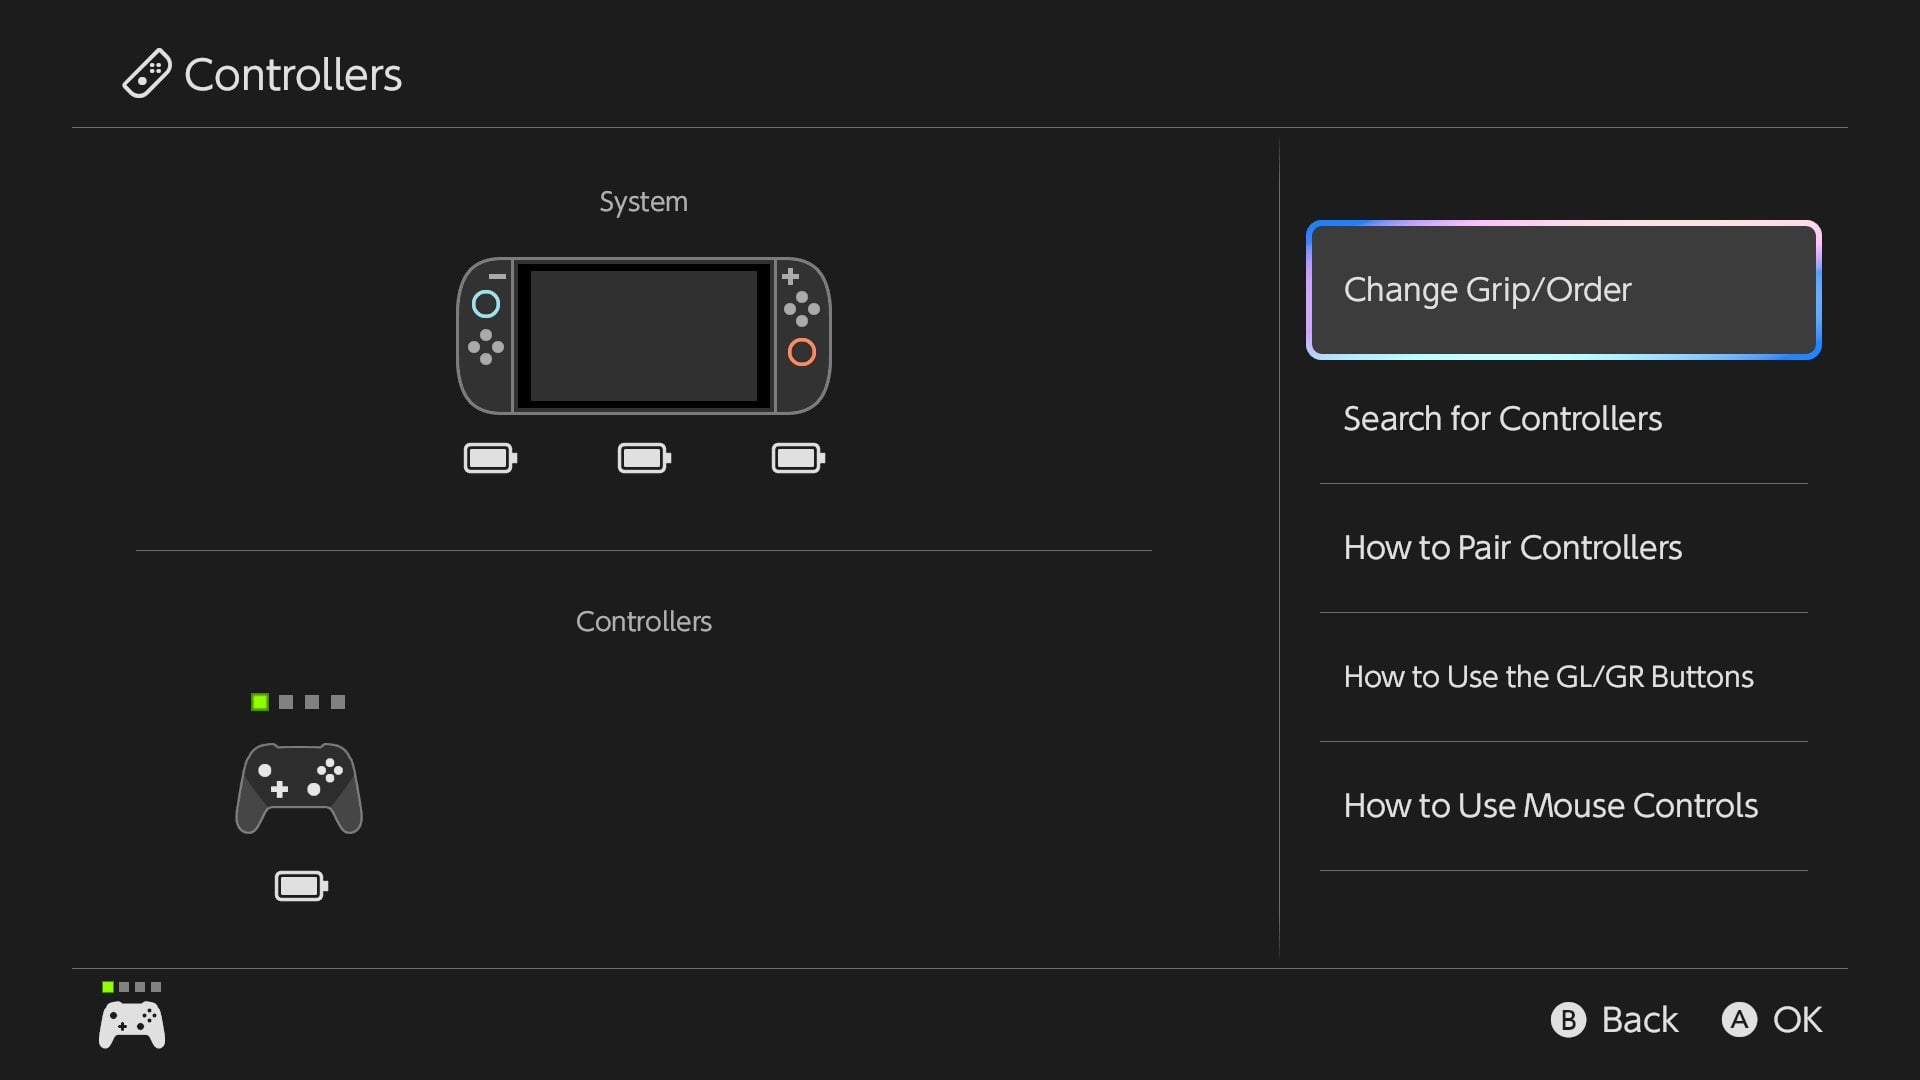
Given how many different control configurations there are for the original Switch, adding a brand new set of options into the mix hasn’t made staying sane any easier for folks with a half dozen Joy-Cons running around. But, again, simplicity is a virtue here. The no-bullshit rundown is this:
Currently, the only things you can physically attach to the sides of the Switch 2 are the new Joy-Cons.
The original Switch’s Joy-Cons and the Pro controller can be paired with the Switch 2 wirelessly.
The Pro controller can also be used wired via USB/USB-C, but you’ll need to enable a setting for it to work (it’s in System Settings > Controllers & Accessories > Nintendo Switch Pro Controller Wired Communication)
Third party controllers are a case-by-case basis. Some publishers have been issuing firmware updates to allow their equipment to work, however. Check their official site first if you’re not sure.
Lastly, it’s a tiny thing, but, sadly, no, you can’t turn on the Switch 2/your TV using the Switch 1’s Pro controller. Bummer.
The Switch 2 might have a couple of quirks you’ll have to sort through before you can jump straight into Mario Kart World or another game of your choice. Hopefully this guide will have demystified the process for you so you’re not wasting any more time menu-diving.