HDR, or High Dynamic Range, is something that you kinda take for granted on consoles and TVs, because once you flick the switch it just happens, every time you use it, forever. On PC, the technology has been a bit more complicated.

On PC, Windows users—those with compatible monitors, anyway—have generally needed a toggle to turn HDR on and off all the time. This is because the brightness and settings used by the feature for games are entirely unsuitable for sitting close to a monitor while browsing/doing work. I need these eyeballs, thank you very much, and if they’re burned to ash inside my skull then they’re not much good for online shopping, reading news articles, or writing blogs for a website.
Previously, that involved a switch inside Windows 10's settings menu, where if you wanted to use HDR you needed to open that menu, flip a toggle, play the game then, when you were done, go back and flip it back off again. I know that sounds quick and simple reading it laid out like this, but any PC gamer experienced with the feature will know it was so easy to forget, and such a weird number of clicks and menus for such a simple option, that it often ended up getting under-used, if not overlooked entirely.
Not anymore! While Windows 11's taskbar and folder changes have got all the headlines, it has also quietly introduced a few HDR settings that are of huge benefit to PC gamers with a compatible monitor.
The first one is a simple keyboard shortcut. Users can hit Win + Alt + B at any time and instantly switch between HDR and standard display. It’s something that I know sounds like it should have been in Windows for years, but has somehow only just made it in. This is great for not just quickly toggling the feature on and off, but for being able to do it quickly from within a game, so you can check out the difference it makes.

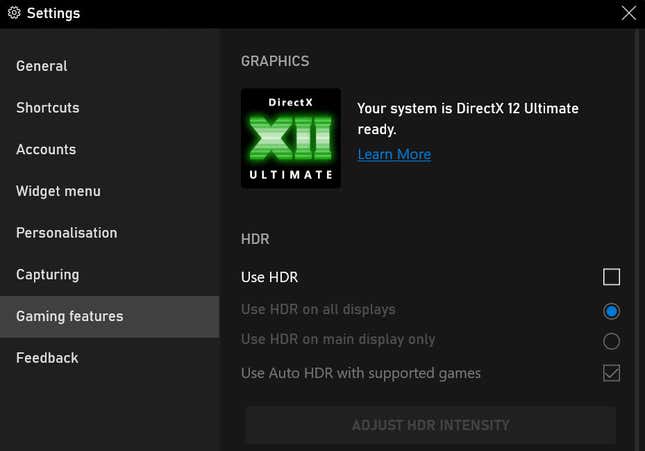
The second is the inclusion of some HDR options within the Xbox Game Bar. From inside the “Gaming Features” section of the Game Bar’s settings menu you can now tell Windows to automatically turn HDR on and off when booting and shutting down a recognised game (very useful for the “burning eyeballs” reason stated above). Once on, you can also adjust the intensity of the effect with a slider. Even better, in games that don’t have their own HDR options Windows 11 will take a swing at adjusting levels itself, and it does an excellent job. I’ve been testing this with a bunch of games and found that it worked every time, and that the slider was always best left set to its maximum.
While these settings actually debuted earlier in the year for testers, and have been available for everyone since Windows 11's release last month, they’d gotten so little fanfare I figured I’d post about them today. You won’t even need to install anything, just go try it out now, see how you like it!