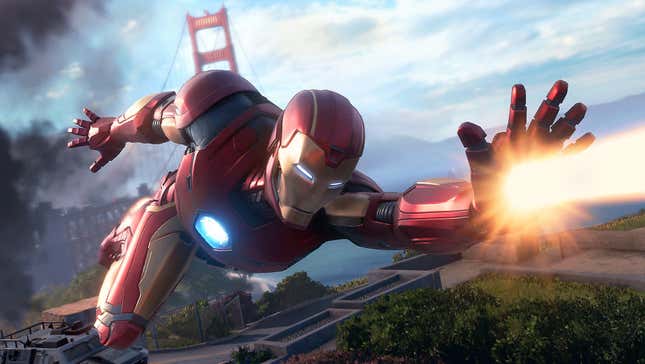
Marvel’s Avengers, officially out today for PlayStation 4, Xbox One, and PC, send players directly to the uncanny valley of the Marvel Cinematic Universe. As with the source material, Earth’s Mightiest Heroes operate uniquely, and reaching black-belt status with each character is something that only comes with time and effort. Still, there’s some general starting advice that applies across the board for this action game.
Start with the campaign.
You may have heard that Marvel’s Avengers is a multiplayer-focused game, wherein you choose a favorite superhero and team up with three others for some super-punching. The multiplayer component is an integral part of the game, but the campaign is the main draw. The game even warns you from the start that jumping straight into multiplayer will spoil the narrative, and suggests that you play through the campaign first. Listen to the game.
For starters, the story is fantastic. Though the whole team gets some screen time, the plot centers around Kamala Khan, a.k.a. Ms. Marvel, reassembling an estranged Avengers team to take on an authoritarian, corporatist robot army. If you mainline primary objectives, you’ll be able to finish it in about a dozen hours. Tackling side-quests and secondary objectives will expand that to around 20 hours. As you play, you’ll add heroes to your roster, which you can then use for multiplayer missions called “War Zones.” You’ll also get a crash course in the intricacies of how each character plays, laying the groundwork for who you might want to prioritize using when you get started with the multiplayer mode.
Mess around with the camera controls.
In the settings, you can choose from three camera perspectives: close, default, and wide. Give each a try. The wide view makes it easier to assay situations, spot enemies, and perform counters. Personally, I like the default and close-up perspectives; both give the game a cinematic feel, a la Tomb Raider or Uncharted. (Fitting, since Crystal Dynamics, Avengers’ developer, helmed the recent line of Tomb Raider reboots. Meanwhile, game director Shaun Escayg co-directed the best Uncharted, 2017’s Drake-less Uncharted: Lost Legacy.)
Don’t sleep on the character-specific quests.
As you fold new Avengers into your team, you’ll open up secondary quest lines for each character. They’re not as long as the main campaign—you can fully complete each in an hour or two—but they feature some fun narrative hijinks you wouldn’t see otherwise. In Thor’s, for instance, you have to take on a guy purporting to be the “real” God of Thunder. Black Widow’s involves infiltrating AIM, the big bad, and assisting bioweapon researchers who want to defect to SHIELD.
These quests are worth checking out for plot alone, but, because Marvel’s Avengers is, at its core, an endless feedback loop of rewards, you’ll get great prizes for knocking out these missions, including some high-powered gear. Finishing a character’s quest line will unlock their iconic outfit. Iconic outfits, as with all others in the game, are purely cosmetic, but they’re easily some of the snazziest in the game. Here’s a look at Black Widow’s:
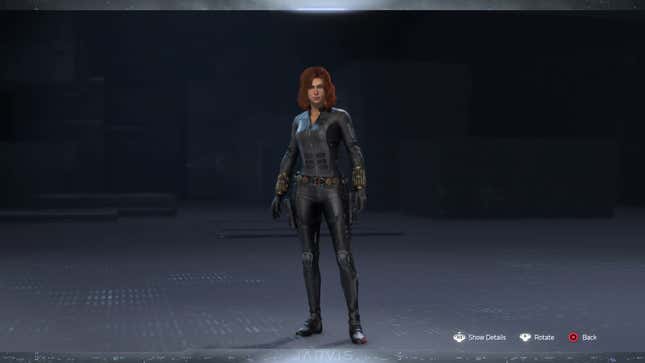
And here’s Thor’s:
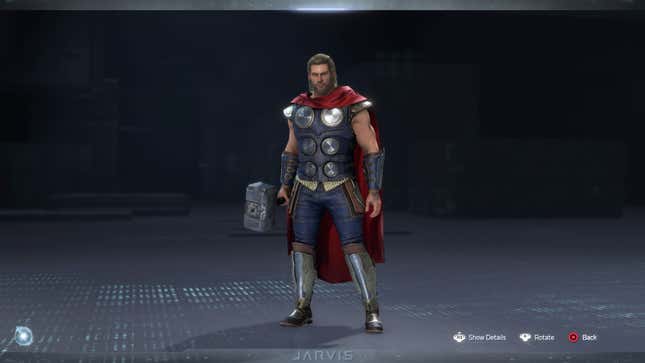
See? Totally worth it.
Don’t stress over the microtransactions.
Seriously, they’re not that bad. As far as big-budget online games go, they’re minimally invasive, and can only be used for cosmetic options—emotes, outfits, and the like. No one’s paying their way to victory here.
Always accept all of the daily faction assignments.
There are currently two factions in Marvel’s Avengers: SHIELD and the Inhumans. Both have a faction level, which you can increase by completing daily assignments (low-effort stuff like “defeat 10 synthoids with heavy attacks”). Doing so will expand the gear you’re able to purchase from that faction’s vendor.
You can accept up to 16 assignments at any given time. Since each faction offers eight daily quests, and since assignments just evaporate from your log if you fail to complete them, there’s no blowback for biting off more than you can chew. Start every play session by visiting faction coordinators and accepting everything they have to offer. If you complete assignments, cool! If not, no sweat.
Hit up on the D-pad at the start of every mission.
Tapping up on the D-pad will activate Tactical Awareness, which will show points of interest in the region and indicate how far away they are. Sometimes, that means you’ll learn the location of a chest. Other times, you might find out where some Inhumans are imprisoned; rescuing them will earn you experience and, in some cases, faction points. Whatever the case, the ancillary objectives always beget something for your efforts. Just one thing to note: If you’re keen to check these objectives out, be sure to do so before completing the mission. The moment you finish your final task, you’ll get whisked away in the Quinjet.
Find comics.
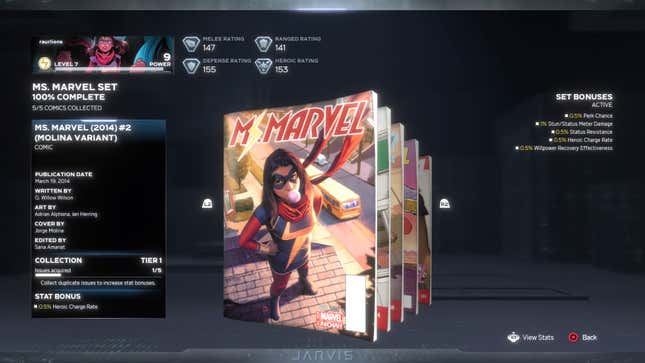
Various collectable comic books are strewn around the game’s world. (Yes, Marvel’s Avengers’ take on the Avengers features a world in which Avengers comics exist alongside the Avengers. It’s a lot of Avengers.) As you punch your way through the Utah Badlands, the Pacific Northwest, and other regions, keep an eye out for seemingly random glints. Every issue you find gives you a small stat boost; find a whole set, and those small boosts cobble together into a sizable advantage. Collect the entire Avengers 1 series, for instance, and all of your characters will get a one-percent boost to armor and heroic effectiveness, plus critical, melee, and ranged damage.
Oh, yeah, you’ll also get to see some sweet IRL comic covers:
Visit the H.A.R.M.
Like the entire populace of Washington, D.C., Tony Stark talks in acronyms. Marvel’s Avengers captures this core character trait with the Holographic Augmented Reality Machine, or “H.A.R.M.” The H.A.R.M. is a featureless “room” you can visit to test out combat builds and abilities. Once a character is added to your roster, you’ll open up their H.A.R.M. mission. They’re short, fun, and will teach you some advanced skills you won’t learn in the tutorial section. As a bonus, knocking them out will earn you random comics.
Learn the similarities between characters.
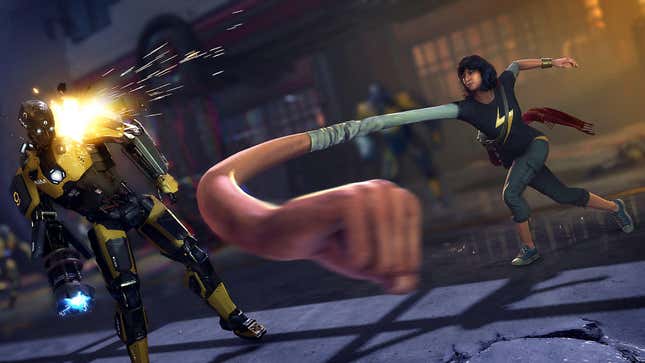
Every character has a light attack, a heavy attack, and a ranged attack. They also each have three superpowered moves that operate on a cooldown: a support ability (for example, Black Widow can turn herself and the whole team invisible), an offensive attack (Ms. Marvel smacks enemies with a Jeep-sized open palm), and an “ultimate” move (Iron Man calls down the near-impenetrable Hulkbuster armor). Understanding these fundamental similarities goes a long way in helping you switch between characters with ease. That said, there’s a world of difference in how each Avenger plays. As you level each character up, and customize skill trees and gear loadouts to your liking, those gulfs widen. Though both start with a similar moveset, a fully decked out Iron Man, with his homing missiles and laser beams, won’t feel remotely the same as a ridiculously buff Hulk.
There’s no way to respec.
Allocate your skill points wisely.
Delete common gear immediately.
As with every other loot-based game, gear in Marvel’s Avengers is color-coded by rarity and power. Here’s how it breaks down:
- White (common)
- Green (uncommon)
- Blue (rare)
- Purple (epic)
- Yellow (legendary)
- Orange (exotic)
Blue, purple, yellow, and orange gear come with perks—passive abilities that might, say, boost your stun damage, or trigger a chance-based explosion whenever you take damage. Often, green gear comes with perks, but it’s sometimes just as useless as white gear. White gear is trash from the start. Just dismantle it as you find it. (This quickly becomes true for green gear, too, but, because of the perks, some discretion is warranted.) You’ll earn fragments, plasma, and other in-game resources for every piece of gear you dismantle. Since you can only hold on to nine pieces per category, it’s not even worth giving white gear the time of day.
Pay attention to Power levels.
Each hero has a character level, which is boosted by earning experience through defeating enemies and completing quests. Broadly speaking, character levels dictate when heroes earn skill points, and not much else. Their Power level is what you really want to pay attention to. That figure more or less governs which quests are or aren’t viable. Before starting missions, you’ll want to make sure your Power level matches, or is at least close to, the mission’s Power.
Power levels are tied to gear; every piece of equipment, from Black Widow’s gloves to Iron Man’s repulsors to Thor’s Mjolnir grip, has one. Load up a character with high-Power gear, and their Power level will go up.
If you’re married to a certain piece of equipment, you needn’t trash it in the name of Avengers’ endless gear cycle. You can level each piece of equipment up by handing over in-game resources like nanotubes, nanites, and other materials with suitably comic-book nomenclature. In addition to boosting that piece’s Power level, with some high-tier gear, doing so will also unlock certain perks.
You can automatically optimize your gear, but that doesn’t mean you should.
In the gear menu, you can optimize for “best gear” at the push of a button. (On PS4, it’s the left trigger.) At first blush, this seems like a huge time-saver, but I’ve found it to be more of a pain than manual curation is. It doesn’t take into account any builds you might be going for, and instead just selects whatever gear has the highest Power level.
Here’s an example: Let’s say you want to deck out your Ms. Marvel for ranged superiority. In that case, you’ve equipped her with some rare gauntlets that have a sweet perk (25 percent chance that landing a critical hit with a ranged attack charges your Heroic moves) plus a high Precision rating, a stat that increases effectiveness with ranged attacks. But in your inventory, there’s another pair of gauntlets with no perk and a low Might stat. Optimizing your gear will put those lesser gauntlets on Ms. Marvel, ruining any distance-based build you’re working on.
A piece of gear’s Power level matters, but its stat is more important. Each piece of gear has one, sometimes two, which you can use to structure your builds. By and large, you’ll want to manually equip gear based on these categories:
- Might for stronger punches
- Precision for sharpshooting prowess
- Proficiency for increased likelihood of landing critical hits
- Valor for supercharging those aforementioned super moves
- Resolve for a bigger health bar
- Resilience for heightened defense
- Intensity for mastering status effects, both in how effective yours are and how well you block against an enemy’s
You can change your character from the War Table.
In the social hubs, post-campaign, you’ll unlock an interactable machine that allows you to swap characters—but you needn’t waste the time seeking it out. Just tap Options (on PS4) from the War Table to pull up the hero selection menu.
Visit each character’s room as that character.
Just trust me. You’ll get a kick out of it.

