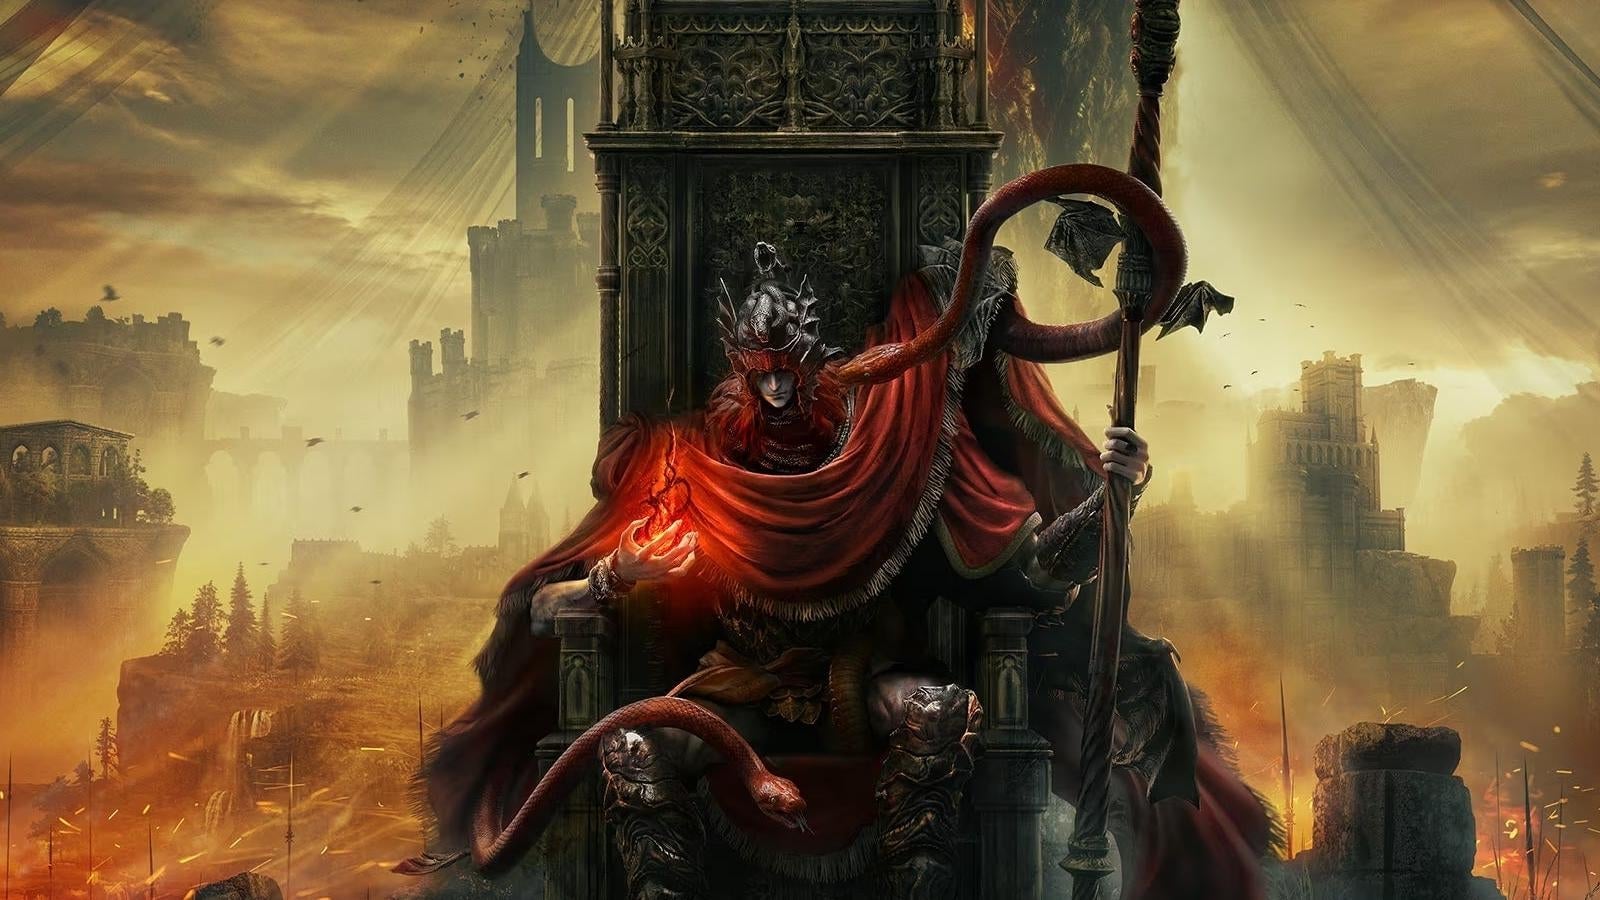
Shadow of the Erdtree warned you right at the outset that it was out to hurt you, and continue hurting you, but once you’ve burned down the Sealing Tree, and made it through the final dungeon, you just might be feeling pretty confident again. The final boss, Radahn, changes that. Immediately. Even after his recent nerf, this is one of the toughest gaming challenges you’re ever likely to face.
Even more than Radagon and the Elden Beast in the base game, Shadow of the Erdtree’s final challenge is the sum total of all lessons learned, because make no mistake, you will need to employ all of it to survive, and slipping up just once is typically enough to send you back to the Site of Grace with your tail between your legs. We can’t guarantee an easy time here. We can’t even guarantee a good time here. But we’ll tell you everything we know, regardless.
Preparation
Given just how extensively these two fights can absolutely fuck you up, preparation is a number one priority, because while there’s leeway in most boss fights to figure out how to fight your own way and still win, this is a very different story, and there’s certain things every player should consider before you even think of walking up those stairs.
High Vigor is nice, but you’re gonna need as much raw defensive power as possible here. That’s less about softening blows, more about narrowly avoiding getting one-shotted if you take a hit. The Dragoncrest Shield Talisman can help, as can the Verdigris Discus Talisman for tanks, though, you’re gonna want to keep a medium roll, especially for the second part of this.
If you fully completed their quests, and they aren’t, uh, downstairs from the boss room, Thollier and Ansbach will be available as NPC summons for this fight. However, tempting as it may be to have all the help you can get, bringing them both in will jack up the boss’s HP. As you’ll learn, you do not want this fight to drag on longer than it has to. In fact, most builds may just want to roll with a fully upgraded Mimic Tear and nobody else.
You’ll want as much resistance to Holy damage as possible for the second part of this. Some armors will be better than others, and in a fight where two hits can kill you regardless, you can take the tradeoff in other stats. There is, however, one specific item you want to bring for this that will help the most: The Golden Braid, found in the Shaman Village in the Hinterlands. Not only does it feel like it was specifically made for this fight, but if you’ve been paying close enough attention, it’s a rather huge—and incredibly sad—piece of the lore puzzle.
For Tanks in particular, either mix a Wondrous Physick flask that raises your max stamina and regenerates it faster, or equip the Two-Headed Turtle Talisman. Your stamina’s about to take a beatdown.
Yes, this is the fight where Miquella’s Broken Rune comes into play, but as we’ll get into, the amount of time needed to use it may not, ultimately, be worth it. Still, if you don’t have faith in your dodge timing, it’s good to have it at the ready.
In an ideal world, your Scadutree Blessing level is over 13, your Revered Ashes over 8.
For weapons and spells: Bring anything that can inflict Bleeding, Scarlet Rot, or Frostbite. Bleeding is ideal, though, since building that up strips a big chunk of health off in one shot, usually enough to immediately trigger the next stage of the fight, and anything you can do to not get in an endurance match is a blessing.
Speaking of: prayer probably wouldn’t be the worst idea.
Now then. Here we go.

Promised Consort Radahn Abilities
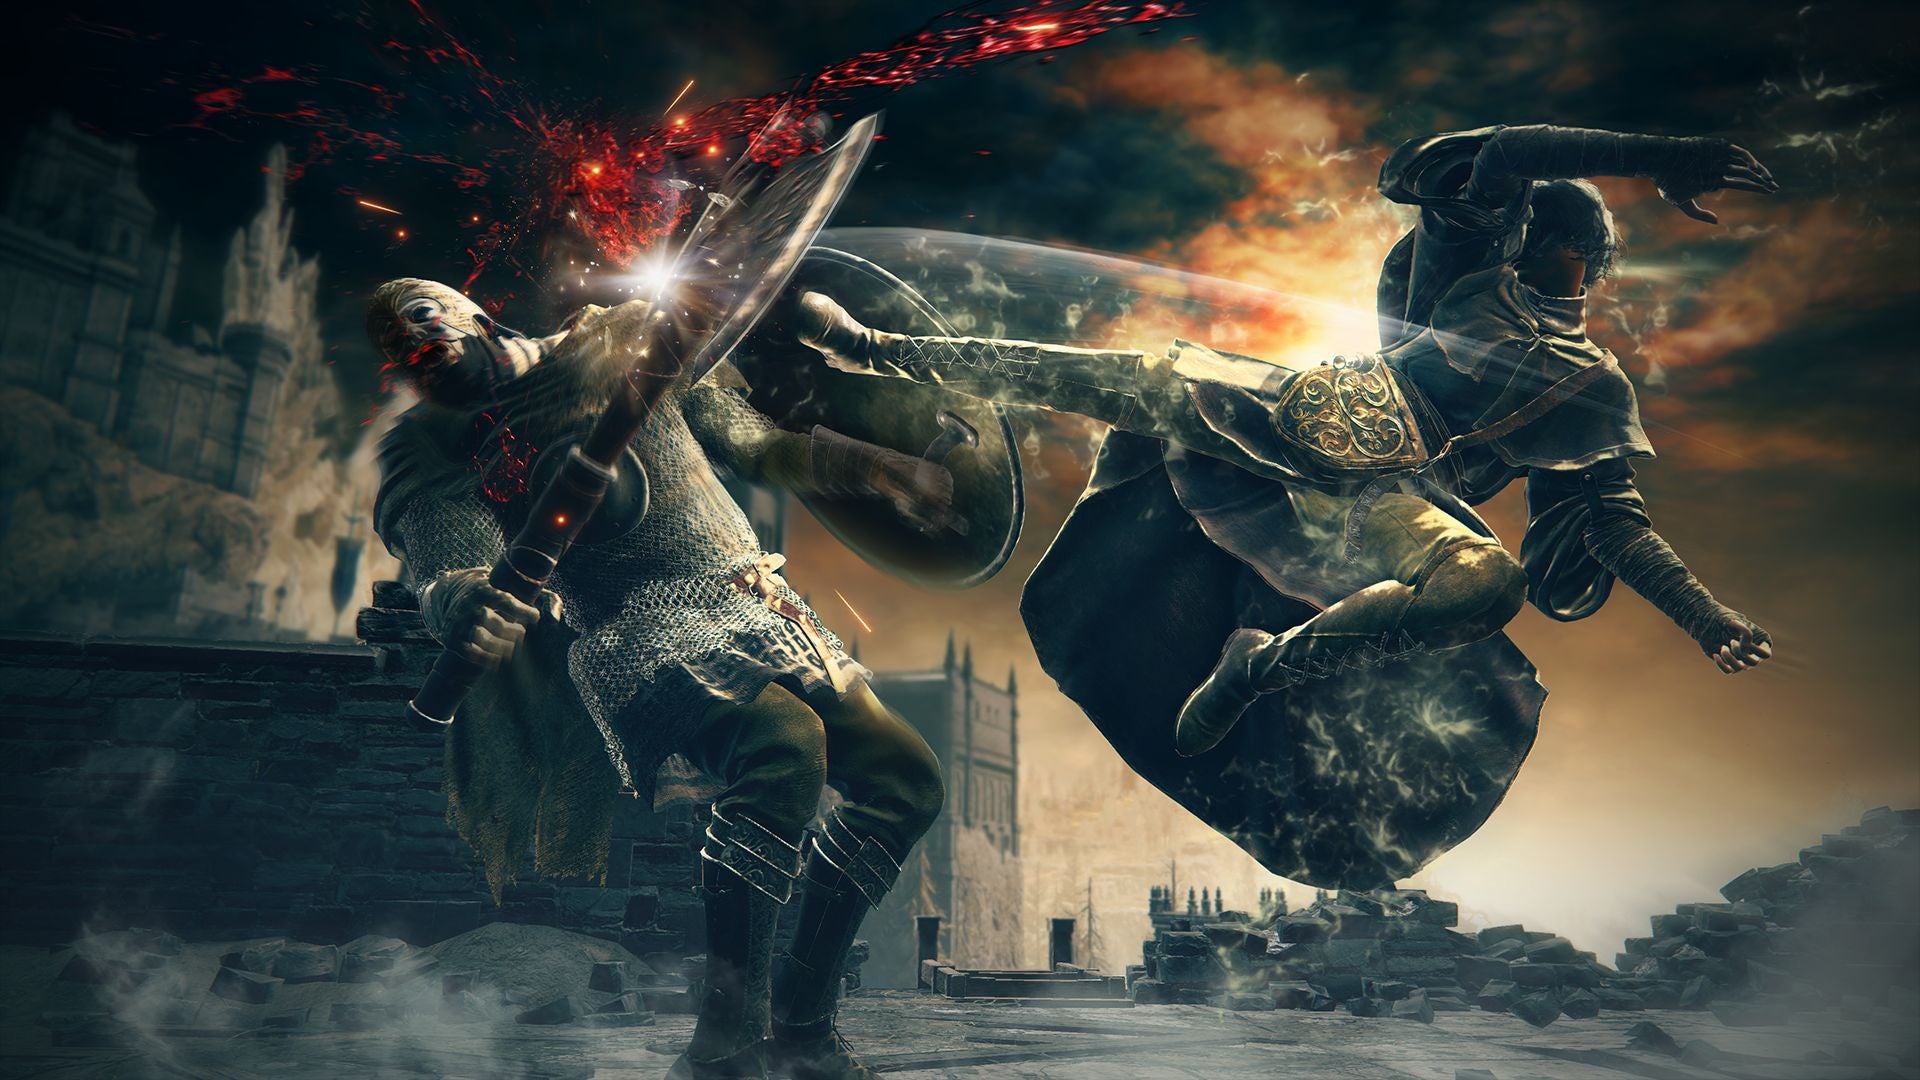
Hello again, friend of a friend. Now you know why you had to kill Radahn’s crazy, horse-abusing form first before you could even get into the DLC. Sorry to tell you though, Starscourge Radahn is small-time compared to his fully resurrected form. He’ll give you a good example right away, since the first thing Radahn does is launch himself at you with a spinning cyclone move which, for the vast majority of builds, is an immediate one-hit kill.
If you survive that, then it’s time for a swordfight. That’s not good news. Radahn’s Greatswords are the size of trees, and although his strikes can come in combinations of two to five, even with a tank build, every hit puts a massive dent in your stamina, and even if a Spirit Ash or summon manages to distract him, he can turn around on a dime mid-combo. That’s to say nothing of Radahn managing to land a clean hit, which can easily put you in critical condition. He’s got a couple of extra tricks up his sleeve on top of that. He can perform a somersault strike once or twice in a row. His four-hit combo ends with an overhead swing that buries his blades in the ground, with area-of-effect damage when he pulls the blades out. There’s a two-hit uppercut combo with the two blades that juggles you into the air if the first swing hits, and smashes you back down with the second. That’s also, typically, instant death.
On the magical side of things, aside from pulling out that spinning cyclone attack if he gets too far away from you, he can enchant his blades with gravity magic, leap in the air, taking chunks of the ground with him, and fire them at you as projectiles. There’s a two-hit combo that creates a bloody rift that hangs in front of Radahn and explodes in a few seconds. That explosion can inflict bleeding on you. And hey, just for old time’s sake, he’ll do a version of Starcaller Cry, except the gravity pull now does continuous sapping damage, and the explosion spawns deadly barbs that can wipe you out in two seconds.
Promised Consort Radahn Strategy
So, the big good news is, after FromSoft dropped that 1.14 patch, Radahn is a little kinder and gentler than before, but we’re talking the difference between getting hit by a train versus getting hit by a Jeep. At least one of those scenarios, the driver can slow down a little, and that’s exactly what FromSoft did to Dahnny Boy, compared to the unholy terror he was before. Thanks, Miyazaki.
There’s some more tiny good news for you: You only need to get Promised Consort Radahn down to about 70 percent health. Of course, the problem is getting even 30 percent of the man’s health down in the most brutal, relentless fight in the entire game. Seriously, once Radahn is in range, he will have his foot on your neck. Just about everything he does will wear down your stamina, your life bar, or both. Extending yourself to do damage is a risk every single time. As such, there isn’t so much a consistent winning strategy for Radahn so much as telling you how to deal with each of his attacks, and you have to make the call on how best to capitalize, and lucking out with his attack patterns plays just as big a role as sheer skill here.
The only other good news is that, if you listened to me with the Preparations section, if you can inflict one of the three status effects on him fast enough, this fight can be over a lot quicker than anticipated. Your Spirit Ash can help if used wisely, and I reiterate that the Mimic Tear is your best friend with this, just because having two of you doing the same damage in the same way can speed this up. I repeat: you don’t want this to turn into an endurance match. The HP boost Radahn gets from bringing Ansbach or Thollier into this will do just that, which is why you bring them in at your own risk.
Here’s the thing, though: The most effective use of the Mimic in this fight requires a mental adjustment. See, most of the time using the Mimic or a summon, its job is to distract the boss while you sneak up behind and do the real damage. It’s the other way around here. You, personally, can adjust and deal with Radahn’s attack patterns on the fly. The Mimic cannot. And as such, your job is actually to pull aggro on yourself as much as possible, partially so your helpers can get some damage in, but mostly with the hopes of keeping your friends alive (and, ideally, with more than half health) for the second stage of this fight. You’ll see why later.
With those in mind, let’s go over seven different ways Radahn’s gonna try and fuck your shit up.
1) When you walk in, you’ll have a few seconds to call in your Mimic Tear before he comes at you with the world’s biggest Psycho Crusher. You can roll through that fairly easily once you see him leave the ground, but his next hit is coming the second he recovers.
2) Sword combos: By now, shieldless folks should have pretty decent common sense when it comes to rolling through combination strikes, and Radahn’s are big, but nearly all of them leave him open just long enough for a single hit. If you’re not a spell user, you’ll want to roll like you’re trying to get around his back. You won’t get there unless your Spirit Ash gets his attention, but it will get you out of harm’s way as long as you time it right. These are the source of your best openings to do damage or heal, however. There’s a fast two-hit combo where Radahn crosses his blades back and forth. Dodge forward on the second hit, and he’ll stand there in a crossed-arms pose for a second. His three-hit can come at any time. It’s dodgeable and blockable, but his follow-up might not be, and dodging or blocking it can leave you low on stamina.
His four-hit combo (single-blade right, dual blades to the left, followed by overhead slam) is the easiest to telegraph, but the AOE on Radahn pulling his swords out of the ground after the final hit has a bigger hitbox than you might expect for anyone trying to stay close. For shielded players, however, this bit is truly his best opening. After blocking the dual-bladed right-to-left strike of that combo, roll around the overhead smash to get clear. If you’re ambitious, close enough, or have the stamina and poise for it, though, you can block the AOE, and guard counter it. He runs with this combo quite a lot, typically, so it’s not out of the realm of possibility to punish him for it enough that you stagger him. Now, that’s pretty dope if you can make it happen, but fair warning that ripostes don’t even knock him on his back. He’ll be coming for you with a vengeance the second he gets off his knee, ripostes cost stamina, and you need every ounce of that you can get . As with everything we’ve been laying out, make a judgment call there.
3) There’s a sweet spot of distance away where Radahn will simply lurch towards you. That’s a prime moment for magic users to strike, but anything that locks you into a cast is a danger.
4) The first strike of his Bloodflame attack leaves a bloody slit in the air. Unshielded players, roll directly backwards twice; once to dodge the second slash, again to get out of range of the explosion. Shielded players, roll left and directly forward. That’ll buy you a hot second to do what you want to do, but then your shield needs to be up and ready for the next problem.
5) The somersault attack: Another potential opening with a big telegraph, however, assume every time he’s gonna flip twice and you’ll never be surprised. If he only does it once, no harm no foul. If he does it twice, your second roll gives you a few seconds to act.
6) The leaping debris attack: The dangerous part actually isn’t the projectiles (though, yeah, if they hit, they do a shitload of damage), but the windup. Radahn will stick his blades in the ground, enchanting them with gravity magic, but there’s a big delay between that and his takeoff. It’s roughly two seconds, but you might take the hit on that a couple of times before you get it perfect. The takeoff does do a chunk of damage, but if you survived it, don’t worry about anything else except the debris Radahn will fire down at you. When he’s up in the air, run directly left or right at full speed and leap over the projectiles when they get close. That attack puts Radahn down quite a distance away from you, which gives you a few seconds of reliable recovery time. He’ll typically close that distance either by walking you down, or with another spinning cyclone attack. Without the pressing need to call a Spirit Ash, though, dodging through his landing on that attack gives you an opening of a couple of seconds.
7) Starcaller Cry: Chances are pretty good, unless you’re halfway across the arena, you’re taking damage from the initial gravity pull. The second you get control back, however, roll twice backwards to avoid the spikes. Probably the hardest of Radahn’s single attacks to avoid, but, as long as you’re not immediately at the epicenter when he strikes the ground, it’s easy to duck out of range. He’s got a couple of seconds recovery time after, as well.
If you’re diligent, and able to capitalize on any and every fleeting gasp for air Radahn gives you, you’ll get him down to the 70 percent sweet spot. And from there, things will get so much worse
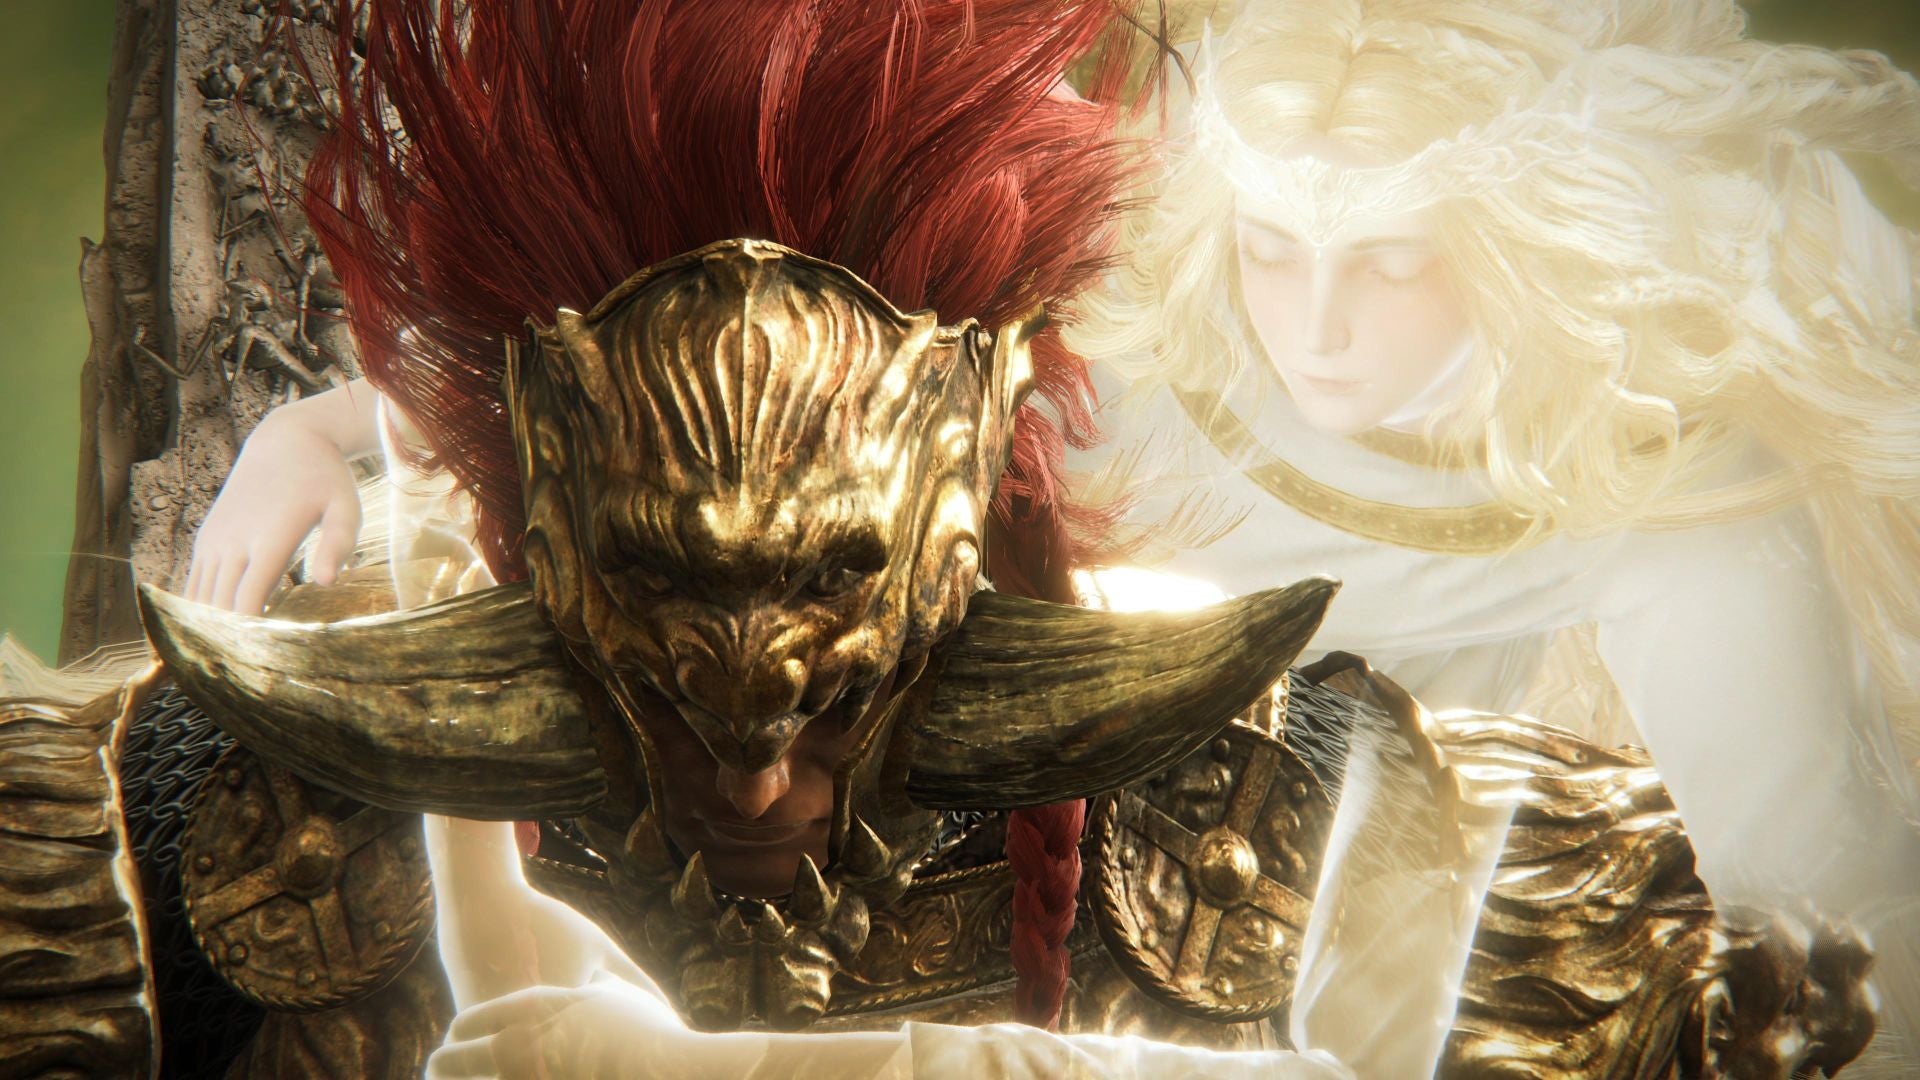
Radahn, Consort of Miquella Abilities
After Miquella enters the chat, it’s a whole new ballgame. Radahn keeps all of his abilities from the Promised Consort phase, except most of them now leave pools of Holy magic in their wake. “Ah, but you didn’t say all of them,” you say, hopefully, desperately. You’re right, after firing the debris attack, he’ll fly across the field at you directly with four afterimage strikes—all of which do heavy damage if even one of them lands unshielded—and his four-hit combo now ends in a giant shower of deadly Holy light. It’s not all of ‘em, really
And then there’s the new shit. Radahn will typically start this stage of the fight with his new widespread area-of-effect attack by floating into the air, setting the entire field alight with exploding pillars of Holy magic. He can now teleport around the area before striking with a combo. If you’re at a distance, he can fire the same magical waves as the candelabra-wielding magicians wandering around the Abyssal Woods/Enir-Ilim. He has a standalone afterimage rushing attack which will hit multiple times and strip the life out of you if any one of them lands. The timing on Starcaller Cry changes a bit, with more of a delay after the initial pull, the initial rise of spikes doing less damage, but he’ll follow that up with an illusory strike which ends with a final Starcaller Cry that does a shitload more damage. Radahn also has a rather benign grab attack; if it lands the first time, Miquella places a crown of light over your head, and will very kindly ask you to surrender. If the grab lands a second time, though, you actually will.
And lastly, there’s Radahn’s nuclear option: Once he’s down to about 25 to 30 percent health, Radahn will take off from the field like a rocket, and after about seven seconds, he’ll crash back down like he’s trying to kill the dinosaurs. To the surprise of no one, it’s instant death if you’re caught anywhere in range of that.
Radahn, Consort of Miquella Strategy
Did you try prayer yet? Well, if that didn’t work, I’m very sorry, you’re actually gonna have to try to kill this asshole. And as before, all we can really do is tell you how to deal with this slew of new problems.
As mentioned, 90 percent of the time, Radahn will start off with the floating area-of-effect explosions. Anyway, if you’re fast, you might actually be able to run out of range of the explosions, but given how unpredictable Radahn is at a distance, this may not be the best option. You’re actually better off getting closer. If you tilt the camera down a bit, you can see where the light shafts will strike, and have a pretty good chance of avoiding them. Even if you do take a hit the first time he does it, though, it does less damage than it will the rest of the fight. That’s especially true if you’ve got the Golden Braid. Thanks, Marika. If you’re close enough, you and/or your Mimic Tear might be able to land a hit or two as he’s rising before you need to start worrying about explosions.
With enough Holy protection, Tanks have a pretty decent chance of still going toe-to-toe with Radahn the same way they did in his first form, but now you have to square with the fact that your health will be getting chipped away every time Radahn swings on you along with the normal, debilitating stamina damage. If you were sturdy enough to withstand the normal combos, you’re gonna need to learn to roll somewhere in the middle of them. The upside for daredevils, however, is that every single normal sword combo now gives you an opportunity to guard counter the Holy magic at the end of it. Again, extremely good stamina/health management come into play here, but if you’re smart, aggressive, and fortified enough, this can be a wild-ass fight that’s over faster than you think.
Related to that: Unless you’re using a Greatshield, Radahn will rip through any other shield like toilet paper. So if you’ve gotta get intimate with anything less, be smart. Rolls are still the order of the day, and for the fully unshielded, roll in the opposite direction of any of Radahn’s swipes (e.g., if his sword’s slicing left to right, roll left) unless Radahn goes for his overhead slam at the end of a combo. The final attack of that covers a sizable area, but it also seems to leave Radahn open a little longer. Roll out of range for that, then get back in his face to take advantage.
For the new Starcaller Cry, dodge it as normal, but after the initial set of spikes come up, wait for the third illusory Radahn to come down before dodging again, then watch for the final strike into the ground. There’s a very odd delay timing on this. Be careful.
And then the grab attack: So, this is a weird one right here. It’s easy to telegraph, just look for the white sparks right over Radahn’s heart, and dodge literally any direction. If he misses, you can punish him with a hit. Hell, more often than not, if it’s still alive, the grab gets your Spirit Ash more than it gets you, and even if it does, it’s a perfect time to recover, buff yourself, even leaves a brief couple of seconds after Radahn lets go where he’s vulnerable for a couple of hits. Still, it’s a concern just because Radahn likes to use it after long combo strings and moments where you think you might have a couple of seconds to heal up. So, you still want to respect it like anything else. And yes, if you do get marked, here’s the moment you’ve been waiting for: Miquella’s Great Rune is the only thing that can remove the debuff. That said, using it does leave you vulnerable for a few seconds, seconds that you probably won’t get many of during this fight, especially when dodging the grab is so much easier. Oh, and it’s up to you if you’re willing to blow a run, but if Miquella does get the second grab, the instant death is wild, and it also gets you the Let Us Go Together gesture.
For the afterimage add-on to the debris attack, keep running left or right after you jump the debris, and dodge the afterimages in the same direction. If you’re gonna use anything other than a Greatshield, block the fourth hit only.
The ground-based illusory rush attack can be deadly, but if it’s dodged, there’s a three second opening where Radahn is a bit of a distance away from you. He’ll be too far away for melee users, but magic can get him good, and right then is a great time for a shot off your flask.
How about the nuclear attack? If you’re quick, and can see the tell fast enough (Radahn will stop dead in his tracks, there’s a hollow lightning-strikey noise, he’ll kneel, then glow for a second), you can get two to three hits in before the initial takeoff. Once Radahn takes to the stratosphere, though, you need to pick a direction, and make like Usain Bolt. Run. Like. Hell. You will have about seven seconds before Armageddon time, and if you’re still alive when it hits, start making your way back towards Radahn, recovering along the way if need be. Don’t worry, he’s got a long recovery time too.
That last 20 percent of health is when things are at their most tense. If they were still alive at all, the bomb attack will absolutely kill your Spirit Ashes. Your resources will be low. And all it takes is one fuck up for Radahn to ruin a lot of work from the last few minutes. But keep calm, respect this man’s abilities no matter how low he is on juice, and we promise you, Radahn will die and stay dead this time.
When you’re done curling up in the fetal position or re-enacting that one scream from Predator, you’ll notice you’ve collected half a million Runes, and the Remembrance of a God and a Lord, which can be turned in for either one of two variants of Radahn’s Greatsword–which cast the new Holy skills you saw during the fight–or the Light of Miquella Incantation which summons the pillars of Holy light explosions. If you want our recommendation: pick the Lord variant.
Once you’re ready, activate the Site of Grace, then interact with the little floating spark in the middle of the area to get the last word from Miquella.
And exhale.