Yeah, sure, Tiny Tina’s Wonderlands has an end goal. Ostensibly, you’re tasked with completing a main story, something about saving the world and defeating the big bad villain and blah blah blah. But c’mon, we all know what the real point is: finding a ton of kickass loot. Let us help.
Like Borderlands, the series of loot-shooters from which it spun off, loot is the thrust of Tiny Tina’s Wonderlands, and can appear in one of five rarity tiers: white (common), green (uncommon), blue (rare), purple (epic), and gold (legendary). But where the previous entry, 2019’s Borderlands 3, showered players with torrential downpours of gold loot, Wonderlands is more of an overcast day.
The result is that gold loot in Tiny Tina’s Wonderlands feels legitimately worthy of its rarity tier, where hearing the ch-CHING of a gold gun drop is enough to immediately turn your head. (Data point: Over the course of my 20-hour-ish campaign, I found just four legendary items.) But there are a number of methods that can help you quickly fill your inventory with more legendary guns, shields, class mods, melee weapons, and other gold-tiered loot than you can handle. Here’s where to start.
Find the ancient obelisks
Forget farming bosses. Instead, seek out ancient obelisks, errant structures tucked off the beaten path. Interacting with an obelisk kickstarts a combat challenge: a few waves of cannon fodder, followed by a boss. Once defeated, each obelisk boss stands a chance of dropping a gold piece of gear.
There are 11 obelisks throughout Wonderlands, each affiliated with a specific biome. The folks at AchievementSquad put together a terrifically thorough video walkthrough highlighting where each one is and how to get to it. Or, if you’re more of a text-based learner, here’s some written instructions:
- Queen’s Gate: It’s inaccessible until you’ve completed the “Emotion of the Ocean” campaign mission. After that, due to narrative reasons I shan’t spoil, a new patch of land opens up on the west side of the map, pretty easy to get to from the starting spawn point.
- Mount Craw: From the Furious Gorge fast travel spot, drop to the lowest level of the region and head all the way to the far side of the lake.
- Weepwild Dankness: You come across this one naturally during the “Thy Bard, With a Vengeance” campaign mission, on your path through the region. (If you miss it, it’s just northwest of the Busted-Ass Ruins fast-travel spot.)
- Tangledrift: On the primary (floating) island, there’s a (floating) peninsula situated halfway between the two fast-travel spots.
- Wargtooth Shallows: From the Recent Beach fast-travel point, go up the hill and head left at the fork.
- Drowned Abyss: On the region’s map, you’ll see a dead-end cave completely off the beaten path, a bit to the west of the Dry’l’s Gallery fast travel spot.
- Crackmast Cove: East of the Saunty Sailor fast-travel spot, there’s a cave behind a waterfall.
- Karnok’s Wall: From The Ribs fast travel spot, you can drop down to a ledge below. That’s where the obelisk is.
- Sunfang Oasis: Once you enter the region, just hug left until you come onto a path leading to a dead end.
- Ossu-Gol Necropolis: Probably the easiest obelisk to find. As you’re making your way through the main mission, you’ll come across a room that has you leaping between ramparts over a pool of miasma. Jump into the pool, then pop into the chamber to your right.
- The Fearamid: At the Ruling Core area, on the basement level, go right down the hallway with a dead end on your map.
While there’s no guarantee of getting legendary loot from an obelisk boss, the drop rates, in my experience, seem pretty high. (Anecdotally, for instance, I’ve only had one obelisk battle where a gold piece of gear hasn’t dropped.) Better yet, from the obelisk in Crackmast Cove, you stand a chance at earning Liquid Cooling, a pistol deemed by longtime Borderlands players as the current best gun in Tiny Tina’s Wonderlands.

Complete Chaos Chamber runs
Chaos Chamber, the thoroughly engaging postgame mode of Tiny Tina’s Wonderlands, is practically a guaranteed method for finding a ton of legendary loot. At its core, Chaos Chamber is Borderlands distilled to its essence: You run through a series of chambers with progressively more challenging firefights. As you play, you’ll earn diamond crystal shards. You can spend these on various buffs or difficulty modifiers. Or, if you make it to the end of a run, you can spend 500 shards on a loot drop affiliated with a specific category of gear, which very often spawns a legendary item.
Read More: The Best Part Of Tiny Tina’s Wonderlands Is Its Endgame
So it merits a bit of risk-reward strategic thinking: If you can complete a run without spending any shards on buffs, you’ll finish with a bunch to spend, easily wrapping up a run with 2,000 shards or more—in other words, at least four rolls on gear drops.
Punch in Shift codes
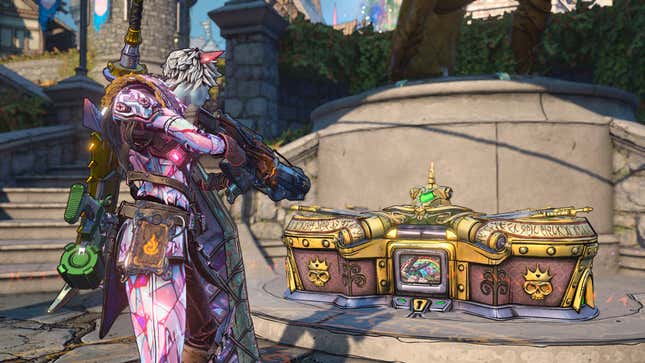
Shift codes have been around since the dawn of time (or, uh, the dawn of Borderlands). Borderlands games run on Gearbox’s proprietary Shift service, which forces you to create a (free, don’t worry) account in exchange for such perks as the ability to play online with your friends, or type in really long strings of alphanumeric code for various in-game prizes. In Wonderlands, you get skeleton keys, which allow you to open a chest in Brighthoof, the main hub city. (It’s right on the mezzanine by the main stairs. Can’t miss it.)

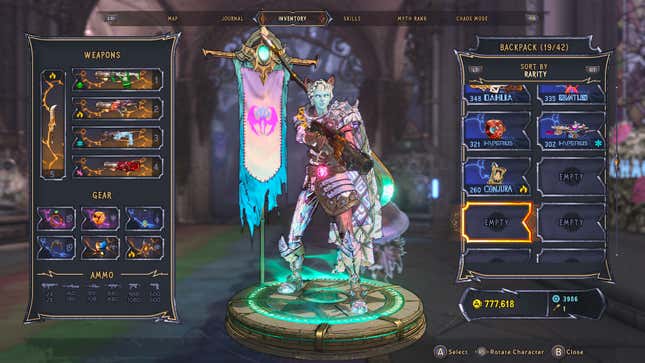
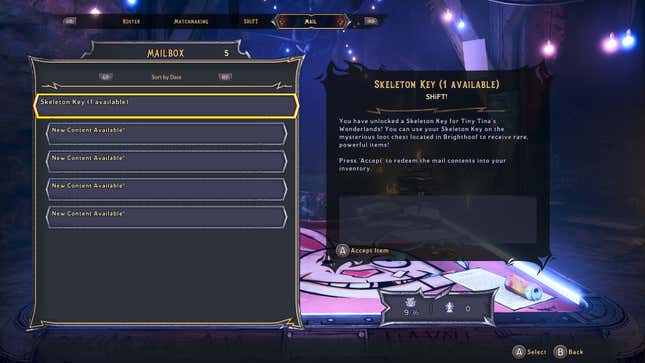
You can input codes on Shift’s website via your web browser, or you can do so directly in the game, though it’s kind of a pain in the ass to type in all those letters with a controller. Once you’ve booted up a Wonderlands save, open the main menu—not the in-game one—and select the social submenu, then thumb over to the Shift tab, enter your Shift code, and click “redeem.” Then go to the mail tab, where you’ll see any skeleton keys (including, by the way, any gear you may have earned from non-standard editions of Wonderlands). Clicking on them will automatically add a skeleton key to your inventory; you can see how many you have in the lower-right corner on your inventory screen.
There are a handful of caveats. Codes seem to carry between characters, but they appear to be tied to your account, so you can only redeem each one once per account. (Which makes sense, to circumvent an easy farming duplication exploit.) They also have time-limited expiration dates.
Senior staff at Gearbox, which develops Borderlands, will regularly tweet out codes. But one kind soul created an automated Twitter bot that scours the web and posts the codes. Here’s a freebie. It expires on April 18, 2022:
JJRJB-CS3WZ-WWTW5-33BJT-JZ9RJ
Personally, redeeming skeleton keys is my least favorite method for sourcing the best guns in the game. Fiddling with a console’s keyboard app is always annoying—even if the PlayStation trackpad makes it a tad easier—and the act of simply typing in a bunch of letters and numbers leaves me feeling as if the prizes within were legitimately earned. But hey, free loot. Isn’t that what it’s all about?